Thursday, February 15, 2018

Crafter's Heart

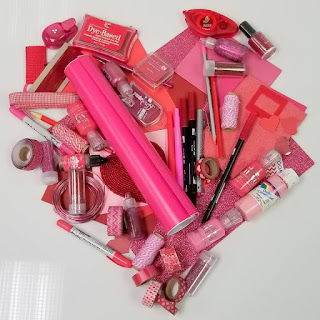
I thought this was a cool photo for crafters on Valentine's day. What's your thought?

https://www.facebook.com/TotallyTiffanyOrganizes/?hc_ref=ARRKhULk3K8gf423NgQiWphBXVCZkTSHGEs8vVeAoEwq8jxOw3mHuHIW-nSdT8hcnD8&fref=nf
The ScrapRack photo.

Friday, April 7, 2017

Magnificent - Shaving Foam Marbling Technique

Today's background masculine cards were created using the 'Shaving Foam Marbling' technique. Using inexpensive shaving cream and ink refills created a cool background. Fill your paper plate with shaving cream. Use a stick to smooth the shaving cream out a bit. Then add several drops of each of your re-inker colors. Mix shaving cream and re-inker in a swirling motion. Don't blend to much, you want the marbling affect.
 Press your card stock into the shaving cream. Make sure your putting the glossy side down and its getting completely covered.Pull your card stock out of the shaving cream and wipe off with a paper towel. Lay another piece of card stock on top of the one covered in shaving cream.  Press together, then pull apart giving you two shaving cream coated pieces of card stock.  Let dry. I love this simple technique. It worked very well for these stamped images.

Challenges I participated in:
Parus Cardmaking Challenges - Anything Goes (April 25) Play along by creating a project and posting it over on the Parus webpage.


Thursday, March 30, 2017

Rrruff Day

A clean and simple card without using dies. This card would be great for a fun loving dog owner. The colors yellow, black and white are classic.  The harlequin patter paper given a new layer of contrast.
Challenges I participated in:
Cas-ual Fridays - No dies Allowed (April 4) (April 4th)
Simon Says Stamps - Wednesday Anything Goes Challenge
The Crafty Addicts - Anything Goes/Clean and Simple (CAS) [April 4]


Monday, March 27, 2017

Vintage Soul

Yesterday, I had some time for art therapy by creating this vintage feel card. The colors (brown, 2 shades of purple, black and various green shades) just work together. Art therapy is a form of therapy that encourages creativity and self-expression as vehicles to reduce stress, improve self-esteem and increase awareness.
You do not have to be an artist to enjoy the benefits of art therapy. In fact, most of the exercises rely not on the final product you create but on the therapeutic, meditative ritual of the creative process.

Challenges I participated in:
Stamped Blessings - Anything Goes + Stamp (April 2)
http://sundaystamps.blogspot.com/2017/03/ssc149-rich-succulents.html (Sunday)


Tuesday, March 21, 2017

Made In The USA

I had fun experimenting and combining various materials for the original mixed media journal page! The background was created with acrylic paints in various colors. After creating the background, I added a piece of a McCall's pattern which really fit with the theme.
Next, I added additional shapes on top along with several ephemera pieces. The finishing touches were real buttons and a magazine tag out of a magazine which read, 'Made in the USA.'  

http://mixedmediamc.blogspot.com/2017/03/mixed-media-monthly-challenge-34-buttons.html
Can you see the theme in my journal page?

Anything Goes Mixed Media


Monday, March 20, 2017

Live Life Love Pocket Letter Embellishment Tutorial

All the rage right now is pocket letters and embellishments for them. Per Jeanette Lang, she created  the idea of Pocket Letters™ as a new way to send letters to your new or existing penpals. Basically, you fill all the pockets of a 9 Pocket Trading Card Protector and send the whole page to someone who wants to swap with you. You fill the pockets with anything you like (stickers, tea bags, a note, washi tape samples, pictures, etc.). I decided to take this idea and only use one of the pockets from the card protector. I added punch pieces, beads, sequins then sealed it with washi tape.  I'm adding this in my flip book for an added embellishment.

Trading card protector. I used one square from the protector to create my diy embellishment. The embellishment was created with sewing or using a fuse gun.
Sunday challenges I participated in:


Thursday, March 16, 2017

A Warm Hello

Today, I have a masculine clean and simple card to share. The card features a technique called 'off the edge.' To accomplish this, one of the feathers was positioned off the edge of the center mat. Embossing on the feathers and wood grain background works nicely together.   
Challenges I participated in:
http://cas-ualfridays.blogspot.com/


Wednesday, March 15, 2017

Scrap Embellishments

I had time to play around with my scraps and create embellishments. These can be used on cards, journaling pages, pocket letters, and even flip books. I created punch art cameras, photo frames and fringed hearts embellishments. What do you think? 

You can watch the Tutorial Video for the punched camera. Access the fringed heart video.

Monday, March 13, 2017

Scrapbook Soup is now Make It Artsy

Over the last few years Scrapbook Soup have done more and more non-scrapbooking projects. So it should come as no surprise that the name of the show -- and the focus -- is being changed this year.

That's right! Scrapbook Soup is becoming Make It Artsy. It opens up a whole wide range of fun new projects and techniques to share. They are filming the first season of the new series in May and it will debut on TV in the Fall.
What do you think? I have seen a few of the previous recorded shows. The website is located here.

Thursday, March 2, 2017

Laugher Shall Fuel Your Spirit's Engine

This journal page was created for the February Pick a Stick Challenge group on Facebook. This challenge group is like using craft supplies you have forgotten about. The prompts we had to use in the correct order are listed below. I didn't use the wild card when creating this page.
I think of this month's challenge as a collage project. I really felt out of my comfort zone when creating this page. Collage is defined as a piece of art made by sticking various different materials such as photographs and pieces of paper or fabric onto your journal page.  Generally I go through magazines and tear out images that catch my eye by their shape, color or the emotion the image conveyed.  I store my images in one box and words/phases in another one. This makes it easier when searching for the perfect pieces. 
The item I used in order of the challenge: die cut flowers, my ephemera piece was a fortune cookie message [Laugher shall fuel your spirit's engine], I used pattern paper and white sharpie for the polka dots, step 4 I created a stencil using a circle punch and then applied yellow acrylic paint, I colored the bird/flower image with copic markers and then fussy cut it out for step 6, I add an mountain image from a magazine, the ticket stud and heart was given to me from a happy mail exchange with Debra, for something old I randomly stamped an background stamp in Tuxedo Mento Black ink. Final step was to add black shading around the bird and the edges of the journal page.

Challenge I participated in:


Monday, February 27, 2017

Flowering Fields

Today, I'm sharing a sweet card idea using the Stampin Up Flowering Fields stamps.  I just adore this stamp set. I love a floral set where you can layer up images and create different textures. To create this card stamped the floral images using Memento Tuxedo black ink across a white cardstock panel. I coloured this first card direct to the cardstock with my Copic markers. I then cut the main image panel in to 3 equal pieces. Mounted the stamped images to black cardstock.
Challenge I participated in:

Spring has Sprung

Here's a cute and simple spring décor item created by up-cycling a Target dollar spot sign.  I love visiting the Target dollar spot to see all the neat and inexpensive items you can purchase/play with.  I bought a pre-painted box sign which had the saying, 'You can do it.' painted on the top.  I decided to paint over the message in purple acrylic paint and add a glitter circle and their dollar spot Easter/spring stickers.  For a finishing touch I added enamel dots.  I have placed this cute décor piece on my coffee bar station. 
What have you purchased from the Target dollar spot lately?

Thursday, February 23, 2017

French Provinical

I love mixing different elements like paper, punches and embellishments. The layering of stamped image gives this card an elegant effect with very little effort. I created the flower embellishment using the folded/rolled ribbon method.  You can view a how to video below.  
How to make rolled ribbon flowers.

Challenges I participated in:


Thursday, January 19, 2017

Adventure Mixed Journal Page


I started off my 2017 by participating in the 'Pick A Stick' challenge on Facebook.  The January #PASCATC0117 prompts are listed below. We needed to complete them in the correct order. I choose not to use the 'Wild Card' for this month's challenge.   
I saw this photo of the bear in one of my photography magazines and thought it represented my word for 2017 - adventure. For step 9 I used a coffee stamp and Memento ink. The background was created with green, orange and brown acrylic paint. The lace was added to a front of a tag and for the extra adhesive I sprinkled fine glitter. 
 Noticed the tag was secured with metal hinges.  I just love how this turned out.
If it scares you, it might be a good thing to try. - Seth Godin


Wednesday, November 23, 2016

Birds of a Feather

This card is a simple layout using pattern paper and a stamped bird image. The image was colored with Copics. I also stamped the image again and cut out one of the birds. The layer effects adds some contrast to a simple design.
Challenges: 


Thursday, August 25, 2016

Rock Around the Clock

Here's a sweet card created using an alarm clock die by Echo Park.  I love how adding the banners and faux flowers gives this card dimension. A simple layout with awesome flair.   

Monday, June 13, 2016

Masculine Metal Birthday Card


I have created a masculine card with the new Delicata ink colors. The Delicata ink colors are perfect for the ‘Faux Metal’ technique.  We will be using Seth Apter Gridiron Fine detailed embossing folder and the Drip Drop etched dies from his Spellbinders Collection along with Black & White Simmer, Celestial Copper Delicata inks from Imagine.
Time: 1 hour
Level: Beginner to Intermediate 
Directions
Step 1
Dry emboss a 4 ¼ x 5 ½ white cardstock using the Seth Apter Gridiron Fine embossing folder. Sponge Black Simmer Delicata ink over the embossed cardstock followed by White Simmer Delicata ink.  This combination of inks gives the impression of metal. Tip: place the wedge sponge (thin end) into a medium size binder clip.  This clip allows better control of the ink without the mess on your fingers.  

Step 1
Step 2
To create the impress metal rivets use ½ inch white cardstock strips.  Turn the cardstock over and apply gentle press with the large end of a stylus.  Sponge the embossed strips with
Celestial Copper Delicata ink.  Sponge the strip edges with the Delicata Black Simmer. 
Step 2
Step 3
Die cut from black cardstock Seth Apter Drip Drop etched dies. Using a crackle stamp with Electric Green Radiant Neon ink: stamp the drip die cut, center circle and circle with the X removed.  Apply Celestial Copper Delicata ink to the X die cut.

Step 3
Step 4
The size of my card is 4-1/4” x 5-1/2” top folding.  Layer the black cardstock 4” x 5 ¼.” Cut the embossed faux metal cardstock into various square and rectangle shapes.  Mount the faux metal pieces and the metal rivets strips in the desire layout onto a black cardstock measuring 3 3/4” x 5.”  Apply the die cut pieces to the front of the card. Ink a Happy Birthday stamp with Versa Mark and heat emboss with black embossing powder. Punch out using a 1 ¼” circle and mount to a 1 ½” black circle.
Step 4
Supplies
Imagine
Delicata – Celestial Copper, Black and White Shimmer, Radiant Neon Electric Green, VersaMark Stamp Pad

Other
Seth Apter Spellbinders Collection – Gridiron Fine Detailed Embossing Folder and Drip Drop etched dies, KaiserKraft – Crackle stamp, Cardstock –  White and black, Tools – scissors, stylus, heat tool, Stampin Up: 1 ¼ and 1 1/2 “circle punch, wedge sponges, binder clips.


Tuesday, May 17, 2016

Ombre Odyssey


Today’s journal page shows you how to create an ombre effect with the fantastic range of Kaleidacolor ink pads by Imagine. Ombre is an effect which has been making appearances in home décor and papercrafts. Ombre means graduated shades of color. The Kaleidacolor pad is a perfect tool to achieve this technique.
Time: 1 hour + dry time
Level: Beginner to Intermediate  

Directions:


Step 1
Place your chevron stencil over your blank journal page. Take your VersaMark and trace inside the stencil pattern. While the VersaMark is still wet sprinkle on the gold embossing powder and heat set. Tip: Emboss three rows at a time to prevent the ink from drying out.   Repeat this process until the journal page is covered. 

Step 2
Press the open Kaleidacolor Blue Breeze dye inkpad on a craft mat and spritz with water.  Apply the ink with a wet paint brush from top to bottom (light to dark).


Step 3
To create the bird’s nest; use a thick and thin permanent black marker. Write the word, ‘Nest’ in a circle in the lower right corner.  Add the darkest shade of ink with a paint brush from the Kaleidacolor Blue Breeze diluted ink to the center of the bird’s nest. This dark color will give the nest some depth. Draw with a pencil a vine and some leaves.  Apply Creative Medium Metallic Bronze with a palette knife to the vine and leaves outline.

Step 4
From old music paper cut out different sizes of leaf shapes. Arrange the leaf shapes on top of the wet Creative Medium.  In the center of the leaves draw swirls with a thin permanent black marker.
Step 5
Print off the computer a bird silhouette. Place the bird silhouette on top of a piece of cork.  Using the bird silhouette as your template cut out the main shape of the bird’s body.  Don’t cut off the feet from the silhouette. Adhere your bird silhouette to the back side of the cork as shown in the photo above. Adhere the bird to the center of the birds nest.
 
Step 6
Add the sentiment. Add dots and doodles with the Morocco irRESISTible Pico Embellisher. Shade around the leaves, sentiment and edges with black pitt pen.
Imagine Crafts featuring Tsukineko:

Other:
Faber-Castell: 101 Stencil Collection, Miscellaneous: Paint brush, craft mat, water, black permanent makers, gold embossing powder, heat tool, cork, old music sheets.  
Gauche Alchemy - Theme: Travel - I enjoy sitting in nature and being inspired.(May)
Creative Embellishments - Inspirational Photo (above): Inspired by the peacocks feathers, they reminded me of leaves. (May)
Tuesday Throwdown - Embossing #249 (Tues)


Friday, May 6, 2016

Small Things with Great Love

Today, we are going to create a mixed media journal page using non-traditional colors in lilac, red blue and gold. We will also use the 'Acrylic and Alcohol Technique' to create a cool background.


Time: 1 hour + dry time.
Level: Immediate to Advanced

Directions:
1. Apply good metallic acrylic paint to the page. Let dry. Place a crackle stencil over the page and sponge with StazOn Azure ink. Let dry. 
2. Place the mini bricks stencil on the journal page and spray with Walnut Lilac. Let Dry. Place the small hole stencil on the journal page and sponge with Memento Tuxedo Black ink. Set aside to dry.  
                                      
3. Cut four - ½ x 4 1/4 inches out of white cardstock. Cut additional pieces of white cardstock: ¼ × 4 ¼, 2 x 3 inches and a scrap piece. Place all cut white cardstock pieces on a craft mat. The technique we are going to use on the piece is called ‘Acrylic & Alcohol Technique.’ Apply StazOn Blazing Red ink by the direct-to-paper technique to all pieces. Set pieces aside to dry. Note: Direct to paper just involves using your ink pad directly to paper. Next mix a 50/50 liquid acrylic in Primary Cyan color and water. Apply the mixture to the dry Azure inked base pieces. While the paint mixture is WET drip rubbing alcohol over the wet paint. You should see mottled background when the alcohol drips on the wet paint. Note: complete this step in small batches to ensure the paint doesn't dry. The image on the far right is the end results of the ‘Acrylic & Alcohol Technique.’
4. Arrange the strip is in the layout above. Cut a 3 inch circle out of old music sheet. Sponge the edges with Memento Tuxedo Black ink.  Keep all scraps from the cutting. Fix the music circle to the center of the strip design. Mount the 2 x 3 technique card as indicated above. Note: The glitter gold piece is from my scrap pile. Stamp the sentiment with Memento Tuxedo Black onto cream cardstock and punch out with small tag. Apply a washi tape to one end of the tag. Sponge the edges with Memento Tuxedo Black ink.

5. Mount the main image to the journal page. Mount the tag as indicated above. Print and cut out a computer printed butterfly. Adhere to main image. Using the scape cardstock and punch out four butterflies. Adhere based on layout.  Shade the main image and journal edges with a Black brush pen. Adhere clear sequins to the journal page. 


Supply List
Imagine Crafts featuring Tsukineko:
Memento Ink Pads: Tuxedo Black, Stazon Ink Pad: Azure, Blazing Red, Walnut Ink: Lilac.

Other: Paint brush, craft mat, water, black Sharpie, gold and blue acrylic paint, stencils (3), sequins, butterfly print, old music paper, glitter scrap paper, Martha Stewart butterfly punch and Black Pitt pen.


LinkWithin

Related Posts Plugin for WordPress, Blogger...